

Hospitals
Evaluating the Universal Trial Frame for Clinical Refraction
An operational guide for procurement managers on evaluating the universal trial frame. Understand key specs, materials, and clinical best practices.


In any ophthalmology or optometry department, subjective refraction remains the gold standard for determining a patient's final spectacle prescription. While automated refractors provide an excellent starting point, the precision of the final correction hinges on a meticulous, patient-interactive process. The universal trial frame is the foundational tool for this process. It is arguably one of the most critical pieces of non-automated ophthalmic equipment in the refraction lane, directly impacting clinical accuracy and patient comfort.
Understanding the specifications and operational nuances of a trial frame is essential for procurement. A common specification, such as "trial frame 18x8x4cm," often refers to the dimensions of the protective storage case, not the instrument itself. This detail highlights the importance of looking beyond catalogue numbers to the instrument's functional design, material integrity, and ergonomic features that ensure reliable performance day after day.
Deconstructing the Trial Frame: Core Components and Adjustments
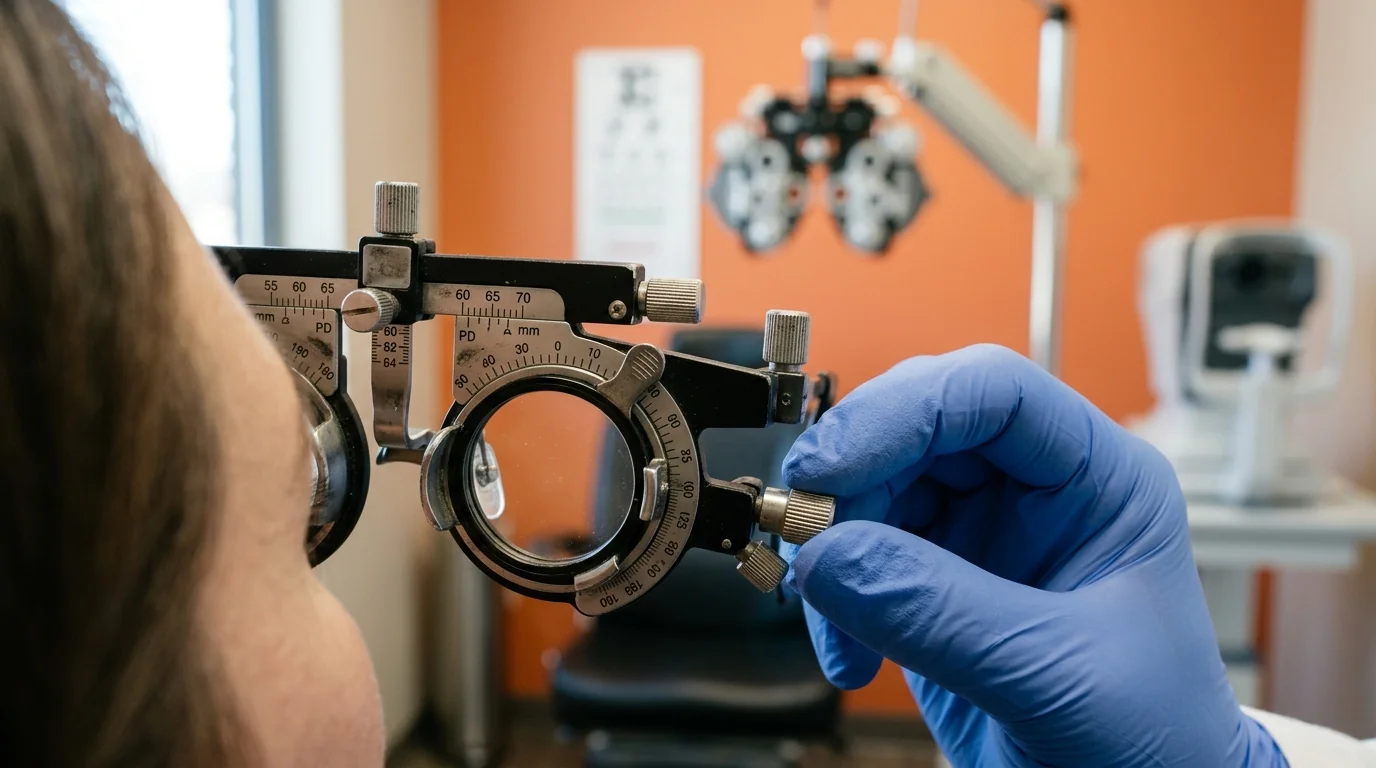 A well-engineered trial frame is a complex instrument with multiple adjustment points. Each one must function with precision to ensure the trial lenses are positioned correctly before the patient's eyes, simulating the final spectacles as closely as possible.
- Interpupillary Distance (PD) Adjustment: This is the most critical setting. The frame must allow for smooth, independent adjustment for each eye (monocular PD) to accommodate for facial asymmetry. Look for a clearly legible scale (typically in millimetres) and a mechanism that locks firmly without drift. Inaccurate PD placement induces unwanted prismatic effects, leading to erroneous prescriptions and patient asthenopia.
- Vertex Distance (Corneal Alignment): The distance from the back surface of the trial lens to the patient's cornea is paramount, especially for higher-power prescriptions (+/- 4.00D and above). A quality frame allows for adjustment of this distance, typically via a calibrated screw or slide mechanism, to match the patient's eventual spectacles.
- Cylinder Axis Rotation: Each lens cell designed for a cylindrical lens must rotate smoothly through 360 degrees. A clearly engraved protractor scale is non-negotiable. Many premium frames feature a click-stop mechanism at specific degree intervals, providing tactile feedback that enhances accuracy and speed during refinement.
- Pantoscopic Tilt and Temple Adjustment: The frame must sit on the patient's face with an appropriate pantoscopic angle (a slight downward tilt). Adjustable temples, both in length and angle, ensure the frame is secure without causing discomfort behind the ears. A frame that slips down the nose alters the vertex distance and optical centres, invalidating the refraction.
- Nose Pad Adjustment: An adjustable, soft silicone nose pad is vital for both centration and patient comfort during the 10-15 minutes a typical refraction can take. A poorly fitting nose bridge will cause the frame to sit too high or low, misaligning the optical centres.
Key Evaluation Criteria for Institutional Procurement
When selecting a trial frame for your facility, a few key physical and mechanical attributes separate a workhorse instrument from one that will require frequent replacement or cause clinical frustration.
Material and Build Quality The choice of material is a trade-off between durability and weight.
- Stainless Steel/Titanium Alloys: Offer maximum durability and hold their calibration well. They can be slightly heavier, which might be a factor for paediatric or geriatric patients.
- Lightweight Metal Alloys & High-Grade Polymers: These materials significantly reduce the overall weight, enhancing patient comfort. When evaluating these, check for rigidity and ensure there is no flex in the frame, which could compromise alignment.
Mechanism Precision and Feel All adjustment knobs and sliders should operate with smooth, consistent resistance. There should be no looseness, "play," or wobble in the lens cells or adjustment arms. The engraved markings for PD, axis, and vertex distance must be sharp, clear, and resistant to fading from cleaning agents. A model like the Sugra Trial Frame Dulex Model - 18 x 8 x 4cm (SUGRA-016), which comes in a standard protective case, exemplifies the type of construction intended for high-volume clinical use.
Lens Cell Configuration The standard configuration is four cells per eye: one fixed rear cell for the primary sphere, two rotating front cells for cylinder and prism/auxiliary lenses, and often a fourth for an additional lens. Ensure the cells are designed to hold standard 38mm diameter trial lenses securely without scratching them.
The Complete Kit: The Trial Frame and the Trial Box A trial frame works in conjunction with a full set of trial lenses, commonly known as a trial box. The accuracy of your refraction depends equally on the calibrated power of the lenses and the precise positioning offered by the frame. When procuring these optometry instruments, ensure they are sourced as a complete, compatible system.
Operational Best Practices: Use, Cleaning, and Maintenance
Proper handling and maintenance are critical to preserving the accuracy and extending the lifespan of your trial frames.
Pre-Use Clinical Checklist:
- Inspect: Before each use, quickly check that all scales are legible and that adjustment knobs are not loose.
- Clean: Disinfect the temple tips, nose pad, and any part of the frame that touches the patient's skin using an appropriate disinfectant wipe (e.g., 70% isopropyl alcohol). Avoid abrasive cleaners that can damage the markings.
- Neutral Setup: Reset the PD to an average of 62-64mm and zero out the axis rotation to provide a neutral starting point for the examination.
Proper Patient Fitting:
- First, adjust the PD to match the patient's measurement.
- Place the frame on the patient and adjust the temple length and angle for a secure fit.
- Adjust the nose pads so the patient's pupils are perfectly centred in the lens apertures.
- Finally, check and set the vertex distance.
Storage and Calibration: Always return the trial frame to its designated hard case after cleaning. This protects it from dust, accidental drops, and impacts that could knock its delicate mechanisms out of calibration. While daily user checks are sufficient, a formal check of all mechanical functions and scale accuracy should be part of a quarterly equipment maintenance schedule for any set of Trial Frame units in a busy OPD.
Distinguishing Between Equipment Categories
In the broad field of medical supplies, precision in terminology is key during procurement. While the trial frame is a cornerstone of ophthalmology, it's important not to confuse it with equipment from other specialities. For instance, a traction machine is a therapeutic device used in orthopaedics and physiotherapy to apply pulling forces to the spine or limbs; it has no application in eye care. Focusing on specialised suppliers of sugra ophthalmic equipment and similar brands ensures you are evaluating instruments designed specifically for the rigorous demands of your department.
Equip Your Facility Today
Ensuring every examination room is equipped with a precise, durable, and well-maintained trial frame is a direct investment in clinical accuracy and patient satisfaction. By standardising on quality instruments, you provide your clinical team with the reliable tools they need to perform accurate refractions, which form the basis of excellent patient care and optical dispensing.
FAQs

