

Hospitals
Evaluating the Taylor Brace: Clinical Application and Procurement Criteria
A detailed guide for clinicians and procurement heads on the Taylor Brace, covering its spinal indications, fitting protocol, material selection, and patient compliance factors.


For any facility managing spinal conditions, the Taylor Brace is a fundamental piece of orthotic equipment. Its proper selection, fitting, and application are critical for patient outcomes, directly impacting recovery timelines and complication rates. This is not just a device; it is a prescribed therapeutic intervention. As procurement managers and senior clinicians, our responsibility extends beyond sourcing to ensuring the orthoses we stock meet stringent clinical and operational standards.
This resource provides a detailed look at the Taylor Brace from a practitioner's and a manager's perspective, focusing on its mechanism, indications, and the key criteria for evaluation and implementation within a clinical setting.
Understanding the Taylor Brace: Mechanism of Action
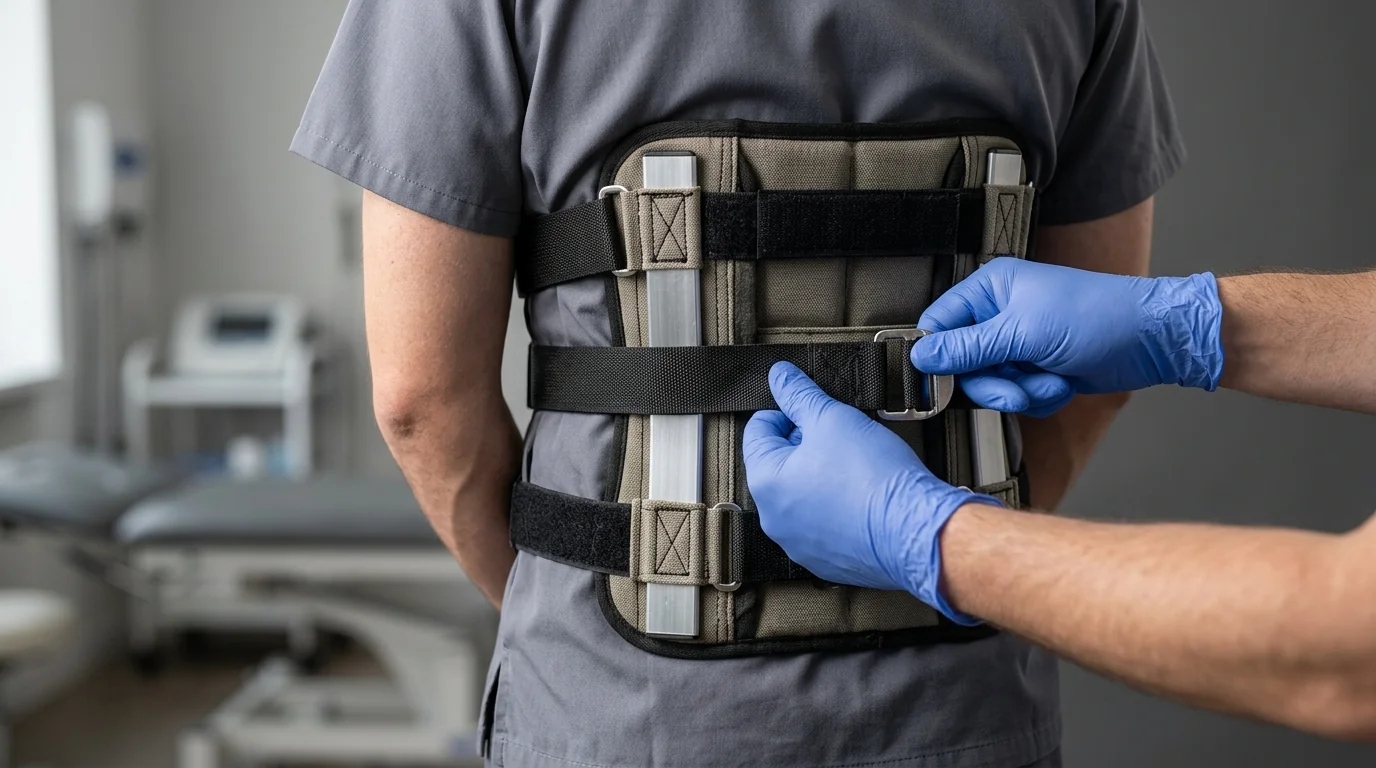 The Taylor Brace is a thoracolumbosacral orthosis (TLSO) designed to maintain the spine in a neutral, or slightly hyperextended, position. Its efficacy relies on a three-point pressure system to restrict spinal flexion and extension, primarily from the T6 to the L5 vertebrae.
The core components work in concert to achieve this stabilization:
- Paraspinal Uprights: Two rigid, yet malleable, metal bars run parallel to the spine. These are the primary structural elements that control flexion and extension. They must be contoured precisely to the patient’s sagittal spinal curve.
- Pelvic Band: A firm band that encircles the pelvis, serving as the inferior anchor for the uprights. It stabilizes the lumbar spine and prevents the brace from migrating upwards.
- Thoracic Band: This superior band sits across the upper thoracic region, working with the axillary straps to provide the counter-pressure that limits forward flexion.
- Axillary Straps: These straps run from the thoracic band, over the shoulders, and under the axillae, securing the brace and applying the crucial anterior force of the three-point system. Proper padding here is non-negotiable to prevent neurovascular compromise or skin irritation.
- Abdominal Apron: A front panel with straps that provides intracavitary pressure, offering additional support and reminding the patient to limit flexion.
By applying posteriorly directed force at the pelvis and upper thorax and an anteriorly directed force at the apex of the thoracic curve, the brace effectively unloads the vertebral bodies, promoting healing and preventing further injury.
Core Clinical Indications for a Taylor Brace
Prescription of a Taylor Brace is specific and should be based on a thorough clinical and radiological assessment. It is not a generic back support. Key indications include:
- Stable Vertebral Compression Fractures: Particularly non-displaced fractures in the mid-to-lower thoracic and lumbar spine (T6-L3), often resulting from osteoporosis or trauma.
- Post-Operative Immobilization: Following certain spinal fusion or decompression surgeries where rigid stabilization is required to protect the surgical site.
- Adolescent Kyphosis: In cases like Scheuermann's disease, the brace can help correct postural deformity and prevent progression during growth.
- Spinal Tuberculosis (Pott's Disease): Used as conservative management to provide support and prevent vertebral collapse in stable cases.
- Metastatic Spinal Disease: For patients who are not surgical candidates, the brace can provide pain relief and structural support.
- Spondylolisthesis: In low-grade, stable cases, it can help manage symptoms and prevent progression by limiting extension.
It is crucial to note that the Taylor Brace is contraindicated for unstable fractures, where surgical intervention is necessary.
Key Evaluation Criteria for Procurement
When selecting a Taylor Brace for your facility's inventory, several factors beyond the basic design must be scrutinized. These details directly influence clinical efficacy, patient compliance, and long-term value.
Material and Construction
- Frame: The paraspinal uprights and bands are typically made from lightweight aluminium alloy. Evaluate its malleability—it must be easy for a clinician or orthotist to contour to the patient's specific anatomy without specialized tools, yet rigid enough to hold its shape under load.
- Padding: The interface between the rigid frame and the patient's skin is critical. Look for high-density, closed-cell foam like Ethafoam or Plastazote. These materials are lightweight, hypoallergenic, moisture-resistant, and can be cleaned easily. Insufficient or low-quality padding is a primary cause of pressure sores and non-compliance.
- Straps and Fastenings: Straps should be made of durable, non-stretch material. High-quality hook-and-loop (Velcro) fasteners are standard, but check their shear strength and lifespan. For bariatric patients or high-activity users, reinforced strapping might be necessary.
Adjustability and Sizing
- Range of Sizes: A supplier should offer a comprehensive range of sizes (Small, Medium, Large, XL, etc.). Insist on a detailed sizing chart based on two key measurements: the distance from the sacrococcygeal junction to the C7 vertebra, and the circumference of the chest/waist.
- Micro-Adjustments: A well-designed brace allows for fine-tuning. The height of the paraspinal bars should be adjustable. The length of the axillary and abdominal straps must offer significant leeway to accommodate different body types. A "one-size-fits-all" approach is clinically unacceptable for this type of orthosis.
Patient Comfort and Compliance
- Weight: The overall weight of the brace is a major factor in patient compliance, especially for elderly or frail individuals. A lighter brace is more likely to be worn as prescribed.
- Breathability: The padding and apron material should allow for some air circulation to reduce heat and moisture buildup, which can lead to skin maceration.
- Profile: A lower-profile design that can be worn under clothing without significant bulk improves cosmetic acceptance and, therefore, compliance.
Proper Fitting and Application Protocol
Effective use begins with a precise fitting. This task should be performed by a trained clinician, orthotist, or physiotherapist.
- Patient Positioning: Have the patient lie in a supine position on a firm surface to ensure the spine is in a neutral alignment.
- Initial Measurement: Measure the patient from the sacrococcygeal junction to approximately one inch below the C7 spinous process to select the correct brace height.
- Contouring the Uprights: Place the brace on the patient's back. Carefully bend the aluminium paraspinal uprights to match the natural lordotic and kyphotic curves of the patient’s spine. There should be no gaps between the uprights and the back.
- Securing the Bands: Fasten the pelvic band first, ensuring it sits snugly over the pelvis, between the iliac crest and the greater trochanter. Next, secure the thoracic band.
- Adjusting Axillary Straps: Thread the axillary straps over the shoulders and under the arms. Tighten them enough to secure the upper part of the brace against the chest, but not so tight as to cause discomfort, chafing, or constriction of the axillary nerves or vessels. You should be able to fit two fingers comfortably under the strap.
- Final Checks: With the patient standing, check for any areas of high pressure, particularly over the clavicles, iliac crests, and along the spine. Ensure the brace effectively restricts flexion when the patient attempts to bend forward.
Operational Considerations: Patient Education and Follow-Up
The brace is only as effective as the patient's adherence to the wearing schedule and guidelines. Your clinical team's role in education is paramount.
- Wear Schedule: Provide a clear, written schedule (e.g., "to be worn at all times when out of bed").
- Skin Care: Instruct the patient to always wear a thin, clean cotton t-shirt or vest under the brace to absorb sweat and prevent skin irritation. They should check their skin daily for any red marks or pressure areas.
- Donning and Doffing: Demonstrate the correct procedure for putting on and taking off the brace. For many patients, assistance from a family member may be required initially.
- Activity Modification: Explain which activities are restricted (e.g., bending, lifting, twisting) and which are encouraged (e.g., walking, as advised by their doctor).
Effective use of the Taylor Brace is a cornerstone of a comprehensive rehabilitation plan, often managed by the department of Physiotherapy. Regular follow-up appointments are essential to monitor the patient’s progress, check the brace fit, and make adjustments as needed.
Equip Your Facility Today
For a comprehensive selection of orthopaedic supports and braces tailored to your facility's clinical needs, explore the curated range on MedikaBazaar.
FAQs

