

Hospitals
A Clinical and Operational Guide to Skin Stapler Use
An authoritative guide for clinicians and procurement managers on the correct skin stapler uses, techniques, and evaluation criteria for hospital settings.

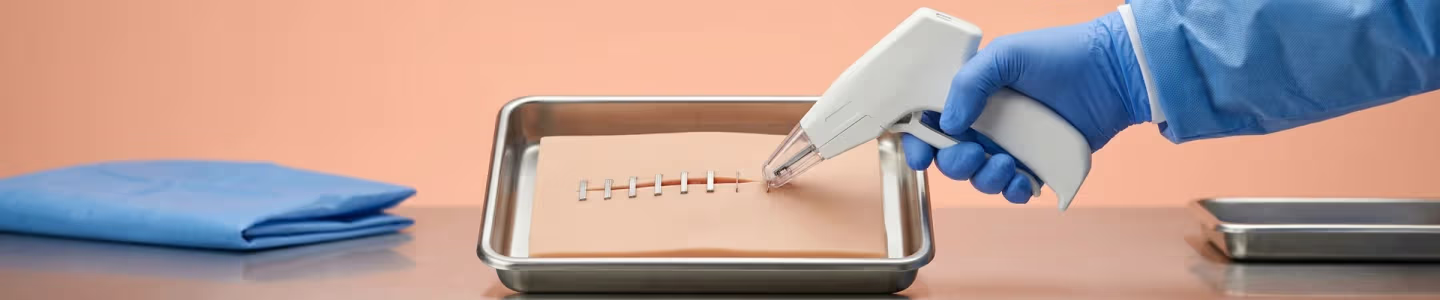
As a procurement head or senior clinician, your decisions directly impact both operational efficiency and patient outcomes. The choice of wound closure method is a prime example. While sutures remain the gold standard for many applications, understanding the specific skin stapler uses is critical for optimising theatre time, managing workflow in high-volume settings like casualty, and ensuring consistent, reliable wound closure.
This guide provides a peer-to-peer overview of the clinical applications, contraindications, and operational considerations for integrating disposable skin staplers into your facility’s standard procedures. This is not a theoretical review; it is a practical resource based on day-to-day clinical realities.
Understanding the Mechanism: How Does a Skin Stapler Work?
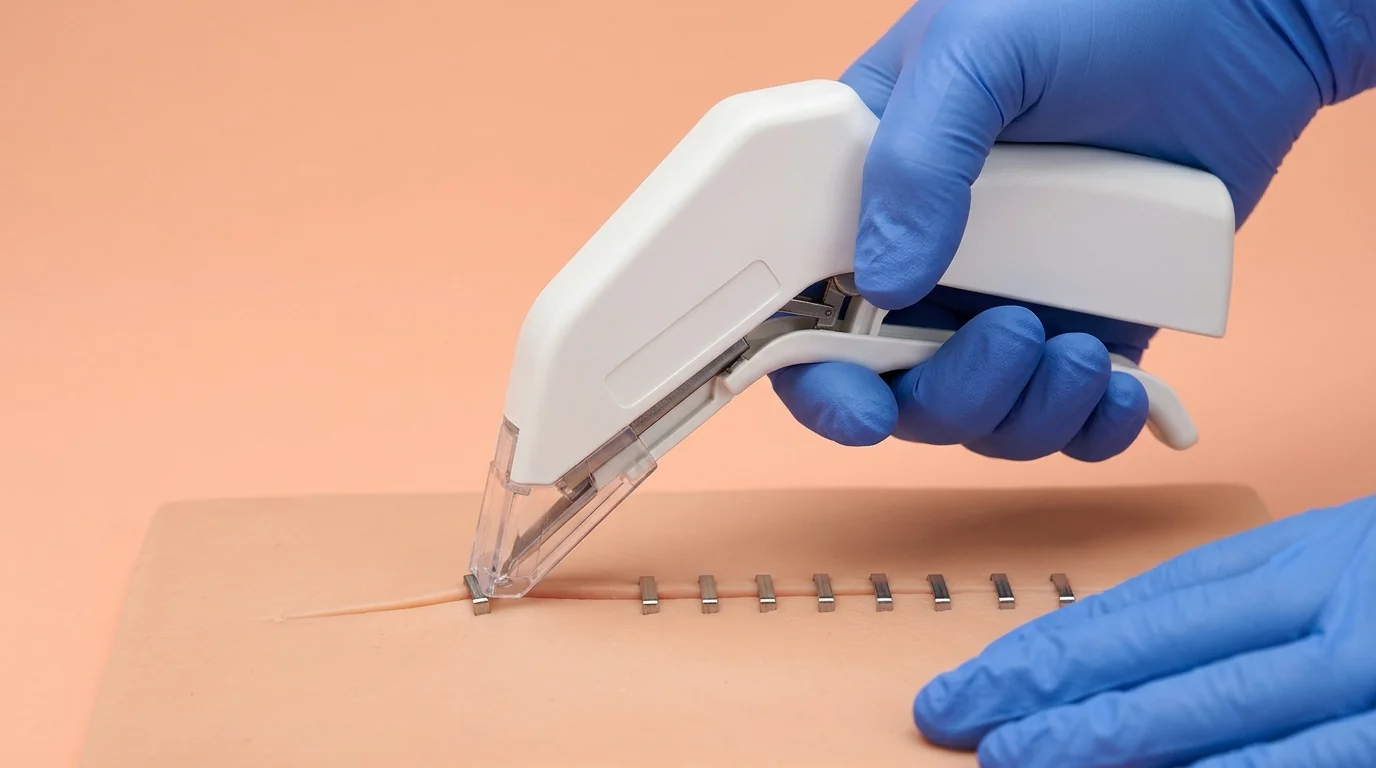 At its core, a skin stapler is a sterile, single-use mechanical device designed for the rapid closure of cutaneous tissue. Unlike sutures which require multiple passes with a needle, a stapler deploys a pre-formed, medical-grade stainless steel staple with a single squeeze of a trigger.
The mechanism is straightforward and designed for consistency:
- When the trigger is activated, a pusher block advances a single staple from the internal cartridge.
- The staple is driven through the approximated skin edges and makes contact with an anvil at the head of the device.
- The anvil forms the staple into a precise rectangular shape, holding the everted tissue together. The crossbar of the staple remains slightly elevated above the skin surface to prevent ischemia and facilitate removal.
This process is significantly faster than suturing, a critical factor in long procedures or multi-trauma cases where minimising anaesthesia time is paramount.
Anatomy of a Single-Use Skin Stapler
While designs vary slightly, the core components of a typical disposable skin stapler are consistent. Understanding these parts helps in both proper use and quality evaluation during procurement. Think of it as a skin stapler diagram in text.
- Handle/Housing: The main body of the device, designed for an ergonomic grip.
- Trigger: The lever that actuates the stapling mechanism. A smooth, consistent trigger action with a clear endpoint is a key quality marker.
- Staple Cartridge: A pre-loaded, sterile cassette containing a set number of staples (commonly 35). The indicator window shows the approximate number of staples remaining.
- Head/Anvil Assembly: The distal end of the device. It includes the anvil that forms the staple and an alignment marker (often an arrow) to help centre the staple over the incision.
- Staple Ejector/Feeder: The internal mechanism that isolates and advances one staple at a time for deployment.
Most devices are designated by their staple count and wire type, for example, '35W' indicates 35 wide staples, which is the standard for skin closure.
Clinical Applications: When to Use a Skin Stapler
The primary indication for skin staplers is the closure of linear, low-tension lacerations or surgical incisions on non-cosmetic areas. Their utility is highest where speed and efficiency are priorities.
Key Surgical Disciplines:
- General Surgery: Excellent for closing long midline laparotomy incisions. The speed of closure can significantly reduce overall procedure time.
- Orthopaedics: Widely used for skin closure after total hip and knee arthroplasty, and for incisions over long bone fractures.
- Obstetrics & Gynaecology: Common for closing the skin layer in Caesarean sections and abdominal hysterectomies.
- Emergency & Trauma: In a busy casualty department, staples are invaluable for the rapid closure of clean, linear scalp, trunk, or extremity lacerations.
Below is a practical comparison for operational planning.
Operational Comparison: Staples vs. Sutures
| Parameter | Skin Staples | Sutures |
| Speed of Closure | High. Significantly faster, reducing OT and anaesthesia time. | Low. Meticulous and time-consuming, especially for long incisions. |
| Operator Skill | Minimal training required for consistent results. | High. Requires significant training and dexterity for good outcomes. |
| Tissue Reaction | Low. Staples are inert stainless steel with minimal foreign body reaction. | Variable. Can be higher, depending on suture material (e.g., braided vs. monofilament). |
| Infection Risk | Generally lower. Staples are non-wicking, reducing bacterial tracking. | Can be higher, particularly with multifilament sutures that can harbour bacteria. |
| Cosmesis | Good for trunk, scalp, limbs. Not ideal for face or hands. | Excellent. The gold standard for cosmetically sensitive areas. |
| Removal Process | Requires a dedicated tool; quick and straightforward. | Simple scissor-snip and pull; can be tedious for long suture lines. |
Contraindications: When Not to Use Staples
Knowing when not to use a stapler is as important as knowing when to use one. Inappropriate application can lead to poor wound healing, dehiscence, and suboptimal cosmetic results.
Avoid staples in the following scenarios:
- Cosmetically Sensitive Areas: Never use on the face, neck, or hands. The resulting "railroad track" scarring is unacceptable. Fine monofilament sutures are the standard here.
- High-Tension Wounds: Areas over joints with significant flexion/extension (e.g., knee, elbow) are poor candidates. The tension can cause the staples to tear through the skin.
- Friable or Thin Skin: In geriatric patients or those on long-term steroids, the skin may lack the tensile strength to hold staples.
- Infected or Contaminated Wounds: Stapling an infected wound can create a closed-space abscess. These wounds require irrigation, debridement, and potentially delayed primary closure.
- Complex or Jagged Lacerations: Staples are designed for linear wounds. They cannot effectively approximate irregular wound edges.
A Step-by-Step Guide: How to Use a Skin Stapler
Correct technique is non-negotiable for achieving a well-approximated, everted wound edge that will heal with a minimal scar. This procedural overview is essential for training junior staff and ensuring consistency. Many facilities find that supplementing written SOPs with a skin stapler use video is effective for practical training.
Procedure for disposable skin stapler use:
- Wound Preparation: Achieve complete haemostasis. The wound must be clean and dry.
- Edge Eversion (The Critical Step): Use two pairs of Adson forceps with teeth. One operator (or an assistant) gently grasps and everts the skin edges, bringing the dermal layers into direct apposition. The skin should be held perpendicular to the wound line.
- Stapler Placement: Position the stapler gently over the everted edges. Align the centre marking on the stapler head directly over the incision line. Do not press down hard; the stapler should just rest on the skin surface.
- Deployment: Squeeze the trigger handle completely and smoothly in a single motion until it reaches its stop point. Hold it there for a moment.
- Release: Release the handle fully. This allows the staple to disengage from the device. Lift the stapler straight up and away from the skin.
- Spacing: Continue along the length of the incision, placing staples approximately 5-10 mm apart. The goal is to approximate the edges without causing tissue strangulation.
Post-Procedure Care and Staple Removal
Patient education is key. Wounds can be cleaned gently, but should not be soaked. The timeline for removal depends on the location and the patient's healing capacity, but generally falls between 7 to 14 days.
The question of how to remove skin stapler staples is straightforward: use the correct tool. The instrument is specifically called a skin staple remover. Improvising with hemostats or other tools will cause unnecessary pain and can damage the healing tissue.
Removal Technique:
- Cleanse the staple line with an antiseptic solution.
- Slide the thin lower jaw of the staple remover completely under the crossbar of the staple.
- Squeeze the handles firmly. This action bends the staple at its centre, causing the two ends to lift vertically out of the skin.
- Once the ends are clear, lift the remover and the staple away from the patient.
- After all staples are removed, it is good practice to apply sterile adhesive strips (e.g., Steri-Strips) across the incision to provide continued support.
Regarding the patient experience, the question does a skin stapler hurt has two answers. Application is done on an anaesthetised wound and is painless. Removal can cause a brief, sharp pinching sensation with each staple, but it is generally very quick and well-tolerated.
Procurement and Quality Evaluation Criteria
For the procurement team, selecting a reliable single use skin stapler involves more than just staple count. Operational performance is paramount.
- Ergonomics and Action: The device should feel balanced. The trigger action must be smooth and require minimal force to prevent operator fatigue and ensure consistent staple formation. A device that jams or misfires is an operational liability.
- Visibility: The head of the stapler should be designed to provide a clear, unobstructed view of the incision line for precise placement.
- Staple Formation: The key performance indicator. A good stapler will consistently form a perfect rectangular staple without twisting or deforming. Evaluate samples to confirm this.
- Certifications and Sterility: Ensure products are EtO sterilised.
- Packaging: Check for robust, sterile, easy-to-open packaging. The lot number and expiry date must be clearly printed.
A well-managed inventory should include standard configurations for different departments. For example, high-volume OTs and emergency rooms often standardise on devices like the mb+ Disposable Skin Stapler (STP35WWH) - Pack of 10 for consistency and reliability. When sourcing, it is prudent to Browse Skin Stapler options to compare features and ensure you have the right tools for your clinicians.
Equip Your Facility Today
Ensuring your clinical teams have access to reliable and effective wound closure devices is fundamental to maintaining high standards of patient care and operational efficiency. A well-considered approach to sourcing skin staplers and removers ensures that your operating theatres and emergency departments are prepared for any procedure.
For detailed specifications and to explore a full range of skin staplers, staple removers, and other wound closure solutions suitable for your facility's specific requirements, review the curated selection available on MedikaBazaar.
FAQs