

Dentist
Understanding Barrier Protection in the Dental Operatory
A detailed guide for dental professionals on the role of skin and surface barriers in infection control. Learn best practices for selecting and using barrier films.


As clinicians and operational heads, our primary mandate is patient safety, which hinges on uncompromising infection control. While the term skin barrier often refers to the patient's own physiological defence, in the context of a dental operatory, the concept expands to a critical operational practice: the use of physical surface barriers to prevent cross-contamination.
Every patient interaction involves contact with numerous surfaces, and many procedures generate aerosols and spatter containing saliva, blood, and other potentially infectious materials (OPIM). While surface disinfection is a cornerstone of our protocol, it isn't foolproof, especially for complex or sensitive equipment. This is where a systematic barrier protocol becomes non-negotiable. It is a fundamental component of standard precautions, protecting patients, staff, and our capital equipment.
Beyond Patient Skin: The Role of Surface Barriers in a Dental Clinic
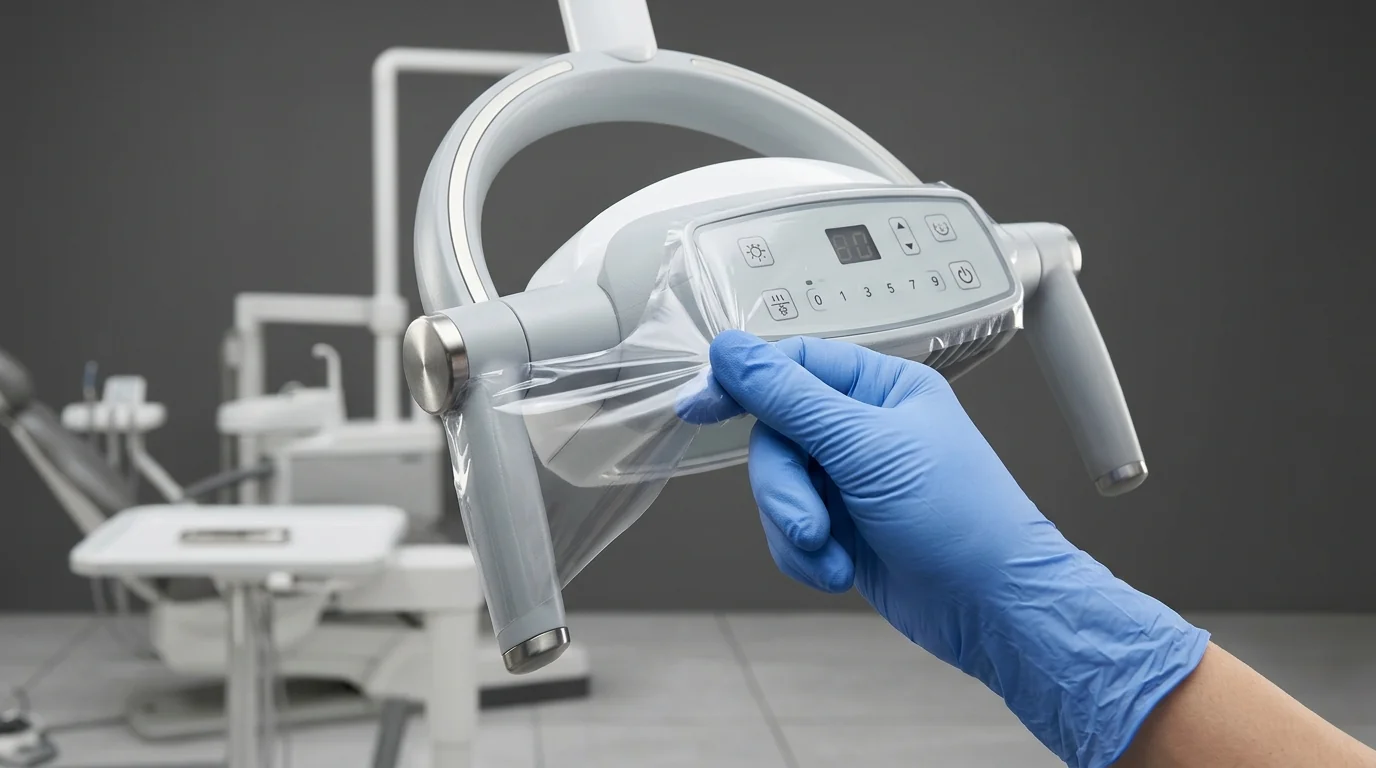 In daily practice, our focus on barrier integrity shifts from the patient to the clinical environment itself. The objective is to cover high-touch surfaces that are difficult to clean and disinfect effectively between appointments. Applying a physical barrier prevents microorganisms from contaminating the surface in the first place, simplifying and improving the efficacy of operatory turnover.
Consider the typical high-touch points in your operatory that are candidates for barrier protection:
- Light handles and switches: Constantly adjusted during procedures.
- Dental chair controls: Headrest levers, seat adjustment pads, and foot controls.
- Bracket tables and instrument trays: The entire control panel and handles.
- Air-water syringe handles and buttons: A primary source of aerosol generation.
- X-ray equipment: Tube heads, control panels, and positioner arms.
- Digital sensors and intraoral cameras: Cords and non-autoclavable components.
- Keyboards and mice: Used for accessing patient records mid-procedure.
- Curing light handles: Moved frequently in and out of the oral cavity.
Without barriers, these surfaces would require meticulous, time-consuming cleaning and disinfection with chemical agents after every patient. This not only increases turnaround time but can also lead to cumulative damage and discolouration of expensive equipment over its lifespan.
Evaluating and Selecting Appropriate Barrier Protection
The effectiveness of your barrier protocol depends entirely on the quality and suitability of the materials you specify. Not all barrier films are created equal, and a poor choice can create more problems than it solves. When sourcing these materials, your evaluation should be based on clinical and operational performance, not just unit count.
Here are the key criteria for your procurement checklist:
- Adhesive Quality: This is paramount. The film needs a light-tack adhesive that adheres securely to various surfaces (metal, plastic, composites) without slipping during use. Critically, it must be removed cleanly without leaving a sticky residue. Adhesive residue is a significant operational headache; it is difficult to clean, can damage equipment surfaces, and paradoxically becomes a new surface for microbial adhesion.
- Material Integrity: The film should be made from a durable, fluid-impervious material like polyethylene. It must be thick enough to resist tearing or puncture from gloved hands or instruments during routine use. A flimsy barrier offers a false sense of security.
- Size and Format: Barriers are available in rolls or pre-cut sheets. Rolls with perforated sections (e.g., 4" x 6") offer versatility and reduce waste, allowing staff to tear off a consistent size quickly. Assess the common surface dimensions in your clinic to choose the most efficient format.
- Visibility: Most barrier films are tinted (typically blue or clear with a coloured edge) for a reason. This allows for quick visual confirmation that a barrier is in place and, just as importantly, ensures it is not forgotten during post-procedure cleanup.
When evaluating options, consider the full spectrum of sizes and adhesive types available in specialised dental barrier films to match the specific contours of your equipment.
Protocol for Barrier Application and Removal: An Operational Checklist
Implementing a barrier strategy requires a clear, repeatable standard operating procedure (SOP) that is understood and followed by all clinical staff.
Application (Before Seating the Patient):
- Perform hand hygiene.
- Ensure the surface to be covered is clean and completely dry. Adhesive will not stick properly to damp or dirty surfaces.
- Dispense a sheet of barrier film, touching only the edges where possible.
- Apply the film smoothly over the target surface, pressing firmly to eliminate air pockets and ensure the edges are sealed. The goal is complete coverage of the high-touch zone.
Removal (After Patient Dismissal):
- Staff must be wearing appropriate personal protective equipment (PPE), including fresh procedure gloves.
- Remove all disposable barriers carefully. Peel them back without touching the underlying "clean" surface with your contaminated gloves.
- Dispose of the used barriers immediately into the appropriate biomedical waste container, as per the Bio-Medical Waste Management Rules, 2016.
- Once all barriers are removed, proceed with the standard cleaning and chemical disinfection of the underlying surfaces. This step is mandatory. Barriers supplement, not replace, surface disinfection.
- Remove gloves and perform hand hygiene.
Integrating Barrier Use into Your Clinic's Infection Control Programme
A successful barrier protocol is more than just having the supplies on hand; it's about embedding the practice into your clinic's culture of safety.
- Standardisation and Training: Develop a clear SOP that specifies exactly which surfaces in each operatory require barriers. Train all team members—from senior dentists to clinical assistants—on the rationale and the precise technique for application and removal. Regular refresher training is essential.
- Auditing and Feedback: Operations managers or lead clinicians should conduct periodic, informal audits. A quick check of an operatory between patients can confirm if protocols are being followed consistently. This provides an opportunity for constructive feedback and re-training if necessary.
- Inventory Management: Effective barrier use is a core part of your overall Dental infection control inventory planning. Ensure a consistent supply to prevent staff from taking shortcuts when stock runs low. The efficiency gained by protecting equipment and reducing turnover time represents a significant operational benefit that supports the investment in these consumables.
By making barrier protection a systematic and audited part of your daily workflow, you demonstrably elevate your standard of care, enhance patient and staff safety, and protect the working life of your clinical assets.
Equip Your Facility Today
Reviewing your current surface protection protocols is a vital step in strengthening your clinic's infection control posture. Ensuring your team is equipped with high-quality, reliable barrier materials is fundamental to providing a safe clinical environment for every patient. Explore the appropriate barrier solutions on MedikaBazaar to meet the specific needs of your practice.
FAQs